
Cinematic Shot Composition: How to Direct AI Like a DP
A practical guide to AI cinematography for filmmakers who want their generated footage to look directed — using the same shot language a real DP would.
If you want your AI footage to look like cinema and not like a stock video clip, you need to stop writing prompts and start directing shots. A real director of photography — a DP — does not type "person in a forest, beautiful." They choose a shot size, an angle, a lens, a light, and a mood. AI cinematography works exactly the same way, just with words instead of glass. In this guide, you will learn the cinematography language that makes generated footage feel directed, the prompt structure that translates that language into results, and the simple workflow you can use inside Storytella.ai to turn a flat scene into a cinematic one.
What "Directing AI Like a DP" Actually Means
A cinematographer is not just the person holding a camera. The DP is the one who decides how the audience feels about what they are seeing. Every choice — where the camera sits, how close it is, what the light does, how shallow the focus is — pushes the viewer toward an emotion.
When you write an AI prompt, you are doing the same job. The AI is your camera, your gaffer, your grip, and your colourist all at once. If you tell it nothing about the shot, it will give you the most average version of "a person in a kitchen." If you tell it the shot size, the angle, and the light, it will give you something that feels intentional.
Directing AI like a DP means writing prompts that contain craft choices, not just descriptions.
The DP's Toolkit: Core Concepts You Need to Know
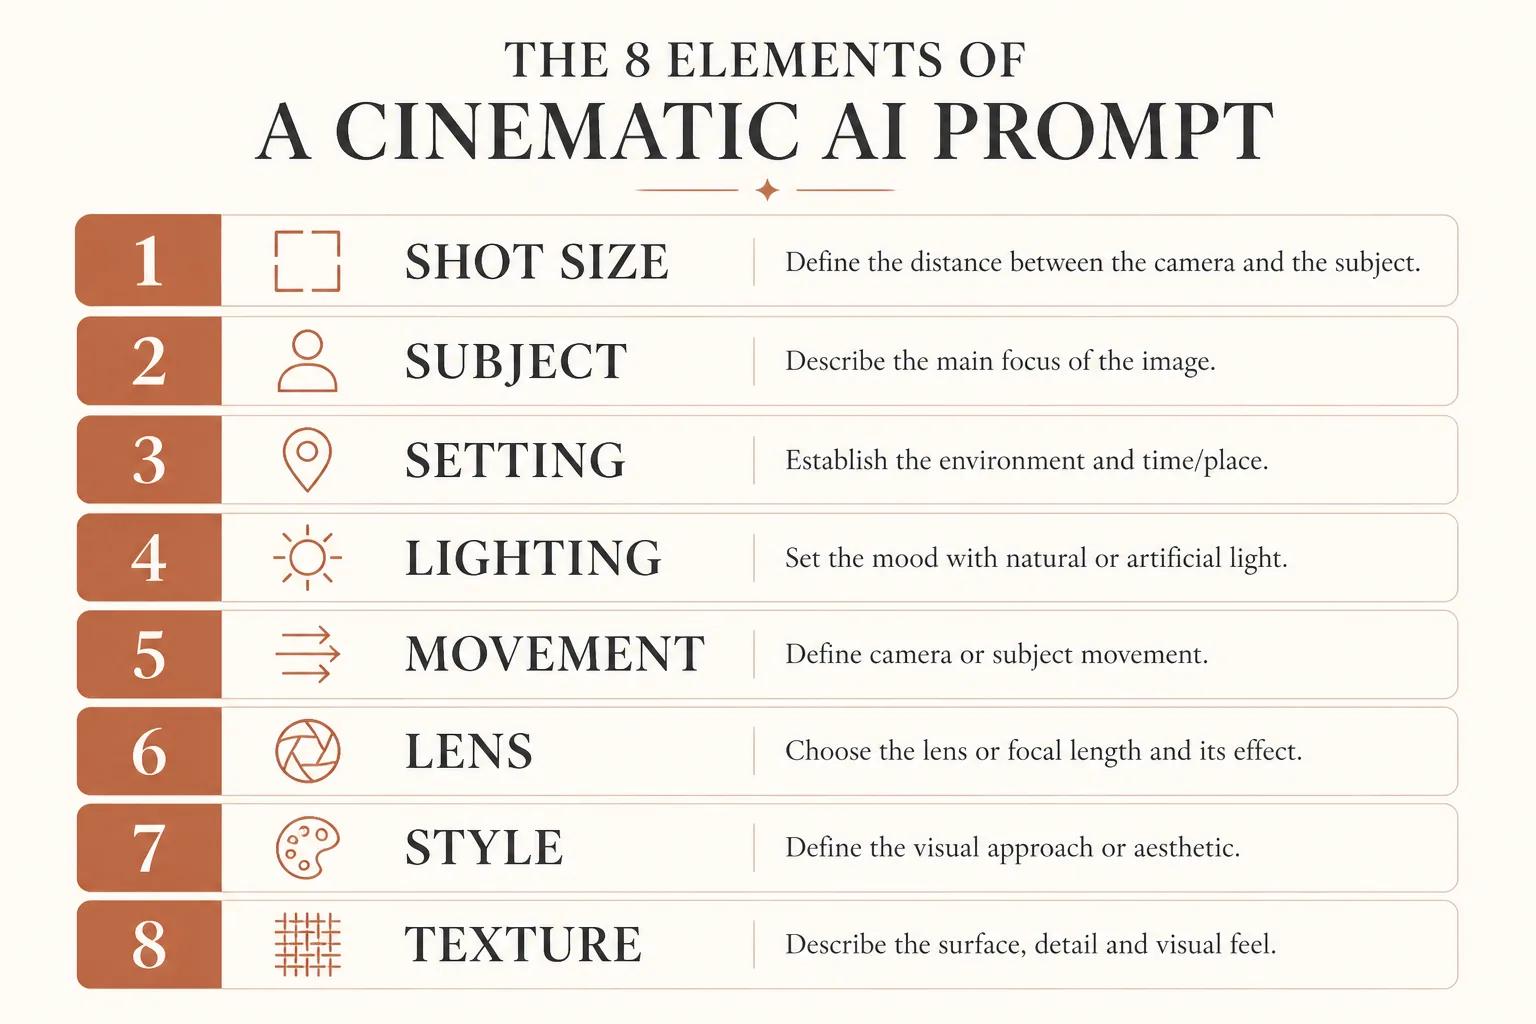
Before you can write a cinematic prompt, you need the vocabulary. These are the five levers a DP pulls on every shot, and they are exactly what your AI prompt should specify.
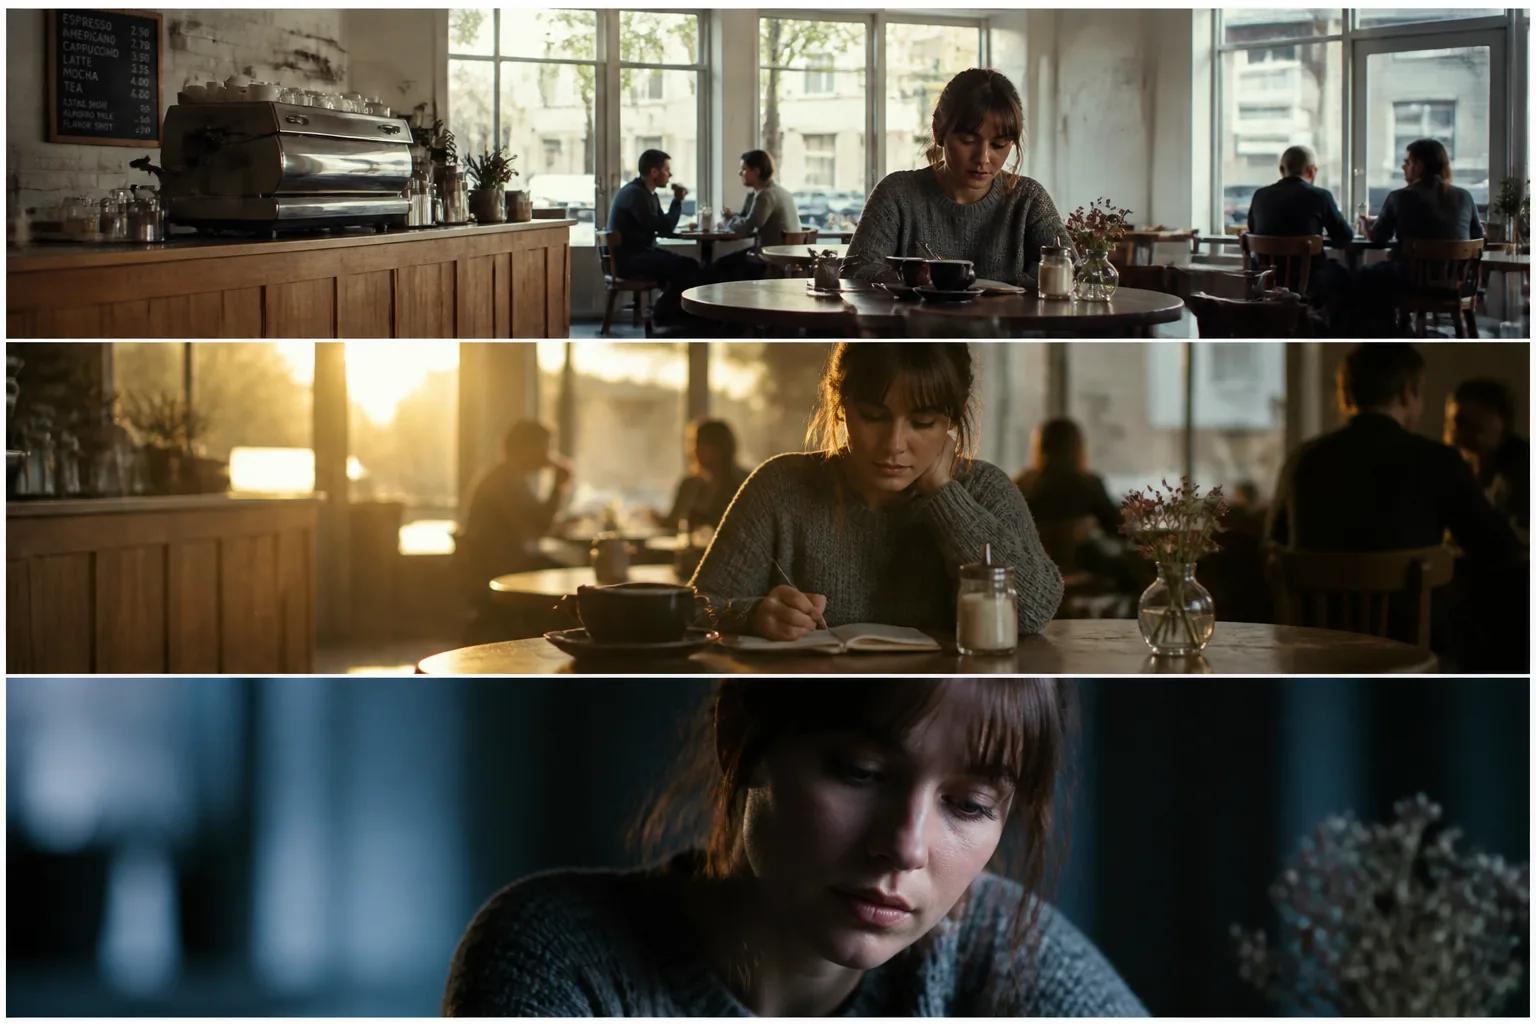
Shot size
How much of the subject is in frame. Each size carries a different feeling.
| Shot size | What's in frame | What it does |
|---|---|---|
| Extreme wide shot | Subject tiny in landscape | Establishes scale, isolation |
| Wide shot | Full body and surroundings | Sets the scene |
| Medium shot | Waist up | Conversational, neutral |
| Medium close-up | Chest up | Intimate but composed |
| Close-up | Head and shoulders | Emotional weight |
| Extreme close-up | Eyes, hands, detail | Tension, focus, reveal |
If you want to go deeper on this lever specifically, our guide to mastering shot size breaks down each size with examples and when to reach for it.
Camera angle
Where the camera sits relative to the subject. Eye level is neutral. Low angle makes the subject feel powerful. High angle makes them feel small. Dutch (tilted) angles signal something is wrong. These are part of a wider vocabulary of named shot conventions — over-the-shoulder, establishing, subjective, canted, overhead, and more — that filmmakers use to communicate emotion and meaning before a single line of dialogue lands.
Camera movement
Static, handheld, dolly, crane, tracking, push-in, pull-out. Movement adds energy and intent. A slow push-in raises tension. A wide tracking shot feels epic. Static shots feel composed and observational.
Lighting and mood
Soft natural light feels calm. Hard side light feels dramatic. Low-key lighting (mostly shadow) is moody and tense. High-key (bright, even) is cheerful and clean. Golden hour is warm and nostalgic. Blue hour is cold and reflective. Neon and practicals feel modern and stylised.
Lens and depth of field
Wide lenses (16mm, 24mm) exaggerate space and feel immersive. Standard lenses (35mm, 50mm) feel natural. Long lenses (85mm, 135mm) compress space and isolate subjects with shallow focus. Shallow depth of field — where the background melts — instantly feels cinematic.
If you can name these five things for the shot you want, you can direct AI.
How to Translate Cinematography Language into AI Prompts
A weak AI prompt sounds like a description. A strong AI cinematography prompt sounds like a shot list note from a DP.
Weak prompt:
A woman walking down a street at night.
Strong prompt:
Medium close-up of a woman walking toward camera down a rain-slick city street at night, slow dolly-in, neon practicals in shallow background bokeh, hard rim light from behind, anamorphic lens flare, cinematic photorealism, 35mm film grain.
Same subject. Wildly different result. The second prompt tells the model the shot size, the movement, the lighting, the lens character, and the visual style. The model now has somewhere to go.
A good cinematic prompt usually contains, in roughly this order:
- Shot size and angle — medium close-up, low angle
- Subject and action — what's happening, who is doing it
- Setting — location, time of day, weather
- Lighting — direction, quality, colour
- Camera movement — static, push-in, dolly, handheld
- Lens and depth — wide, long, shallow, anamorphic
- Visual style — photorealistic, film still, animated, illustrated
- Texture cues — film grain, colour palette, atmosphere
You will not always need all eight. But the more of them you specify, the closer you get to the shot in your head.
Step-by-Step: Composing a Cinematic Shot in AI
Here is the workflow. Use it for every shot, not just the hero ones.
Step 1: Start with intent, not aesthetics
Before you touch the prompt, ask: what is this shot for? Is it establishing a place? Revealing a character's inner state? Building tension? The shot's job decides the shot size and angle. A reveal needs a slow push-in or a rack focus. A power dynamic needs a low or high angle. A moment of isolation needs a wide.
If you cannot say in one sentence what the shot is doing for the story, you are not ready to write the prompt yet.
Step 2: Choose your shot size
Match the size to the moment. Big emotion → close-up. Big world → wide. Conversation → medium. New character or environment → wide first, then push closer.
Step 3: Pick the angle
Eye level is your default. Use low or high angles deliberately. If you are using a Dutch tilt, you should be able to explain why — it usually means something is wrong in the scene.
Step 4: Add lighting and mood
This is where most AI footage falls flat. "Cinematic lighting" is too vague. Be specific: "warm side light from a window, soft shadow on the opposite cheek." Or: "harsh overhead fluorescent, cold cyan tone, hard shadows under the eyes." The model rewards specifics.
Step 5: Specify the lens or movement
If the shot is static and intimate, say so: "static, 85mm portrait lens, shallow depth of field." If it is moving, name the move: "slow dolly-in" or "handheld tracking from behind." Camera language tells the model what kind of motion to render.
Step 6: Iterate and refine
Generate. Look at the result. Compare it to the shot in your head. If the lighting is off, change the lighting line — do not rewrite the whole prompt. Treat each element of the prompt as a separate dial. This is how DPs work on set: change one thing, see the result, change the next.
Common Mistakes That Make AI Footage Look Amateur
A few patterns show up in almost every weak AI shot. Once you see them, you can avoid them.
Vague lighting. "Beautiful lighting" or "cinematic light" tells the model nothing. Name the source, the direction, and the colour.
No shot size. If you do not specify, the model defaults to a flat medium-ish shot every time. That uniformity is what makes AI footage feel generic.
Eye-level by accident. If you never specify an angle, every shot ends up at eye level. Pick angles deliberately, even when eye level is right.
Over-stuffed prompts. Twenty stylistic adjectives stacked on top of each other dilute the model's focus. Keep it tight: one shot, one mood, one style.
Ignoring continuity. A cinematic scene is not just one cinematic shot. Match lens, light, and palette across shots in the same scene, or it falls apart in the cut.
Treating it like one and done. The first generation is the rough draft. Real DPs refine. So should you.
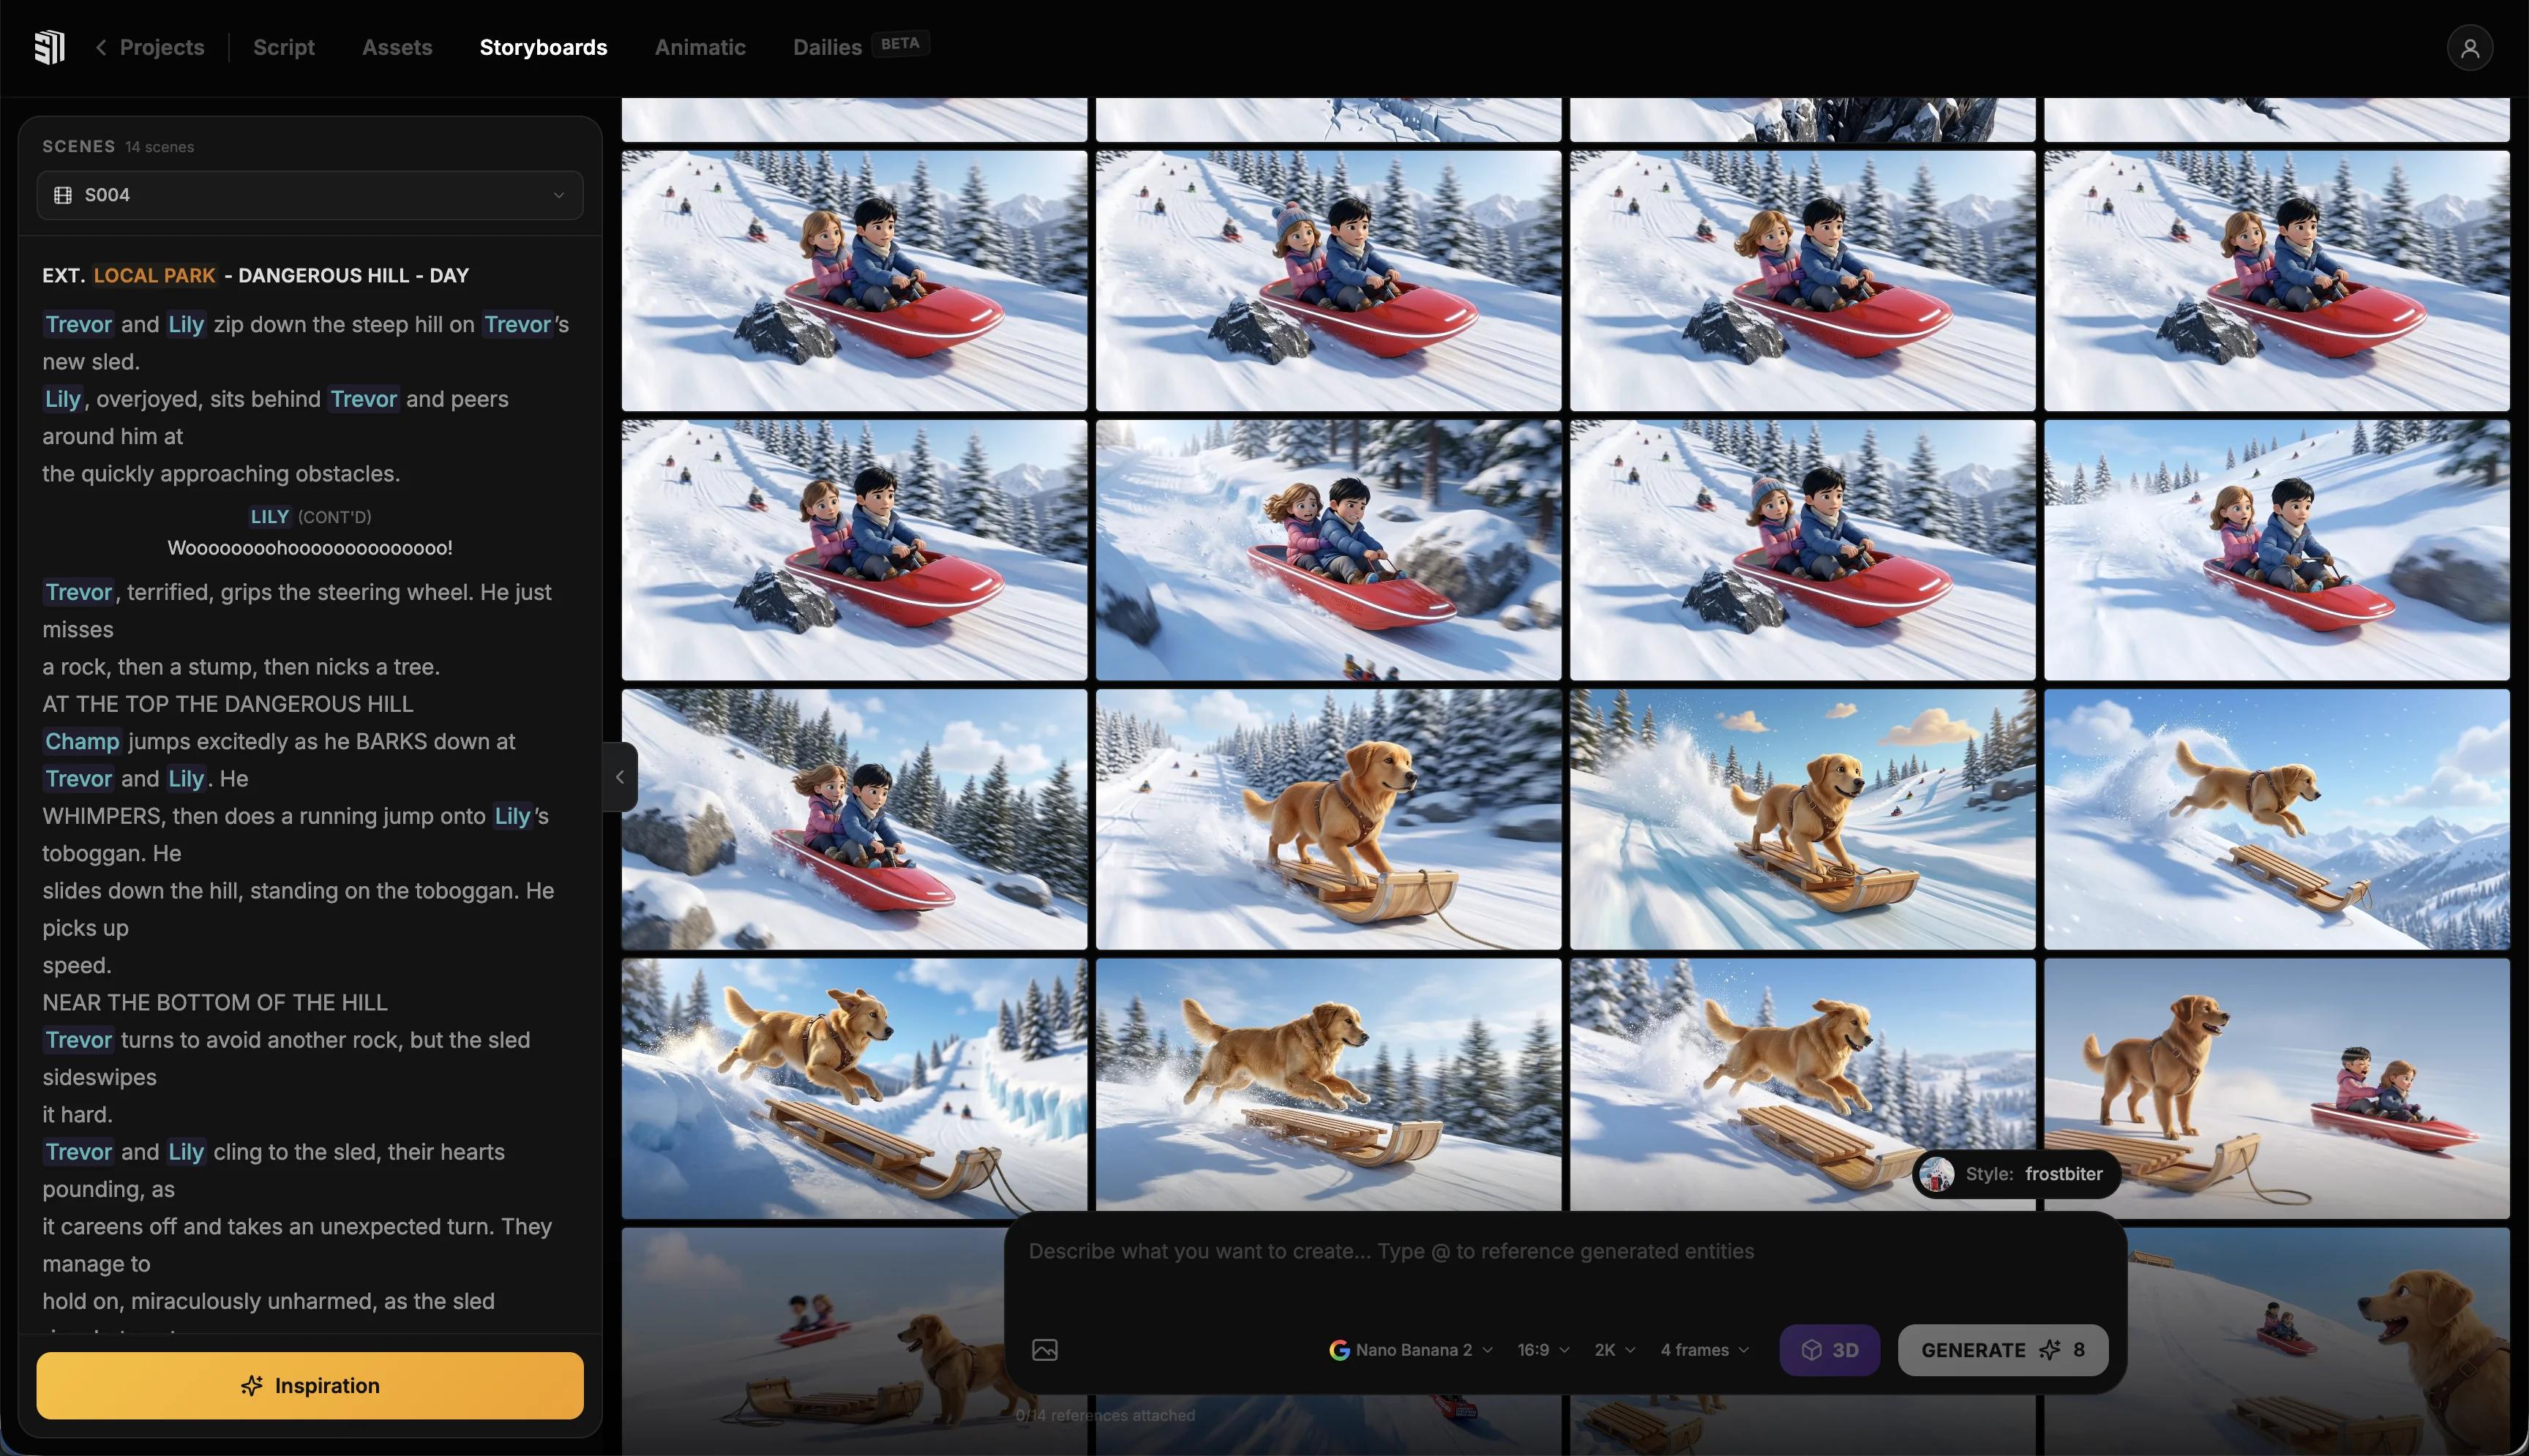
How Storytella Makes Cinematic Direction Easier
A lot of AI video tools generate one beautiful clip and leave you stranded when you need a second one to match. The hard part of cinematography is not the single shot — it is the consistency across an entire scene, an entire film.
Storytella.ai is built for that. You move from script to scenes to final cut in one environment, with character consistency across shots and style control applied across the whole production. That means once you have nailed the look — your lensing, your palette, your lighting language — you can hold it across every scene without restarting from scratch each time.
You still do the directing. Storytella just stops the technical drift that wrecks most AI projects on shot number five.
The practical workflow inside Storytella looks like this:
- Write or paste your script
- Generate scenes shot by shot, using the cinematography language above in each prompt
- Lock the visual style across the production once it feels right
- Regenerate or refine individual shots without breaking continuity
- Cut it together in the same environment
You are still the DP. The platform is your crew.
FAQ
What is AI cinematography?
AI cinematography is the practice of using cinematographic principles — shot size, angle, lighting, lens choice, movement — to direct AI-generated video. Instead of describing scenes in everyday language, you write prompts that read like a DP's shot list, which gives the AI model the structure it needs to produce footage that actually looks like cinema.
Do I need to know film school terminology to direct AI well?
You don't need a degree, but you do need the vocabulary in this guide. Knowing the difference between a medium close-up and a wide shot, or between a low angle and a Dutch tilt, is the minimum. The rest is taste, and taste comes from watching films closely and copying what you love.
Why do my AI shots all look the same?
Almost always because your prompts do not specify shot size or angle. Without those, the model defaults to its most average composition — usually a flat eye-level medium shot. Add explicit shot language to every prompt and the variety returns immediately.
How do I keep visual consistency across multiple AI shots?
You need three things: a consistent visual style description (palette, film stock, grain), consistent lighting language across shots in the same scene, and a tool that holds character and style across generations. Doing this manually across separate generations is brutal, which is why platforms like Storytella.ai hold style at the project level instead of the prompt level.
Can AI replace a real cinematographer?
Not in the way that question is usually meant. AI is the camera and crew, but the creative decisions — what the shot is for, what it should feel like, how it cuts together — are still yours. The DP's craft has not gone away. It just lives in the prompt now.
What's the single biggest improvement I can make to my AI shots today?
Add a specific shot size and a specific lighting description to every prompt. That one change does more for the cinematic feel of your footage than any fancy stylistic adjective.
Conclusion
AI cinematography is not a new skill — it is an old skill, repointed at a new tool. Every choice a DP makes about shot size, angle, lighting, lens, and movement still matters. The only difference is that you are now communicating those choices in a prompt instead of on a set.
Treat each prompt like a shot list note. Be specific about size and angle. Name your light. Pick your lens. Iterate the way a real DP iterates — one element at a time, until the shot lands. And hold your style across the whole production, not just one clip.
The filmmakers whose AI work looks great are not using better models than you. They are directing better than you. That is good news, because directing is something you can practice and improve, one shot at a time.
Try Storytella.ai and direct your next film like a real DP — script to final cut, no crew required.
Your story awaits
The set is ready for you.
Turn your screenplay into stunning storyboards and animatics in minutes — not months. No drawing skills required.
Free to start · No credit card required · Cancel anytime