
Script to Storyboard with AI: Step-by-Step Guide
The practical walkthrough for filmmakers who want to go from written scene to visual storyboard using AI — without drawing a single frame by hand.
Turning a written script into a visual storyboard used to mean hiring a storyboard artist, spending days sketching panels by hand, or wrestling with software that assumed you already knew how to draw. For most indie filmmakers and solo creators, it was a step that either got skipped or slowed the whole project down.
AI changes that. Today you can go from script to storyboard in hours, not days — with no drawing skills required. In this walkthrough, you'll learn exactly how to use AI tools to break down your script scene by scene, generate visual frames, and arrive on set (or in your AI video platform) with a clear shot plan already built.
What Does "Script to Storyboard" Actually Mean?
A storyboard is a sequence of visual panels that represents how your film will look — one frame per key shot. It shows the camera angle, what's in frame, how characters are positioned, and how the scene moves. Directors use storyboards to plan complex sequences, communicate the vision to their crew, and catch problems before they become expensive on set.
Going from script to storyboard means translating your written words — dialogue, action lines, scene descriptions — into visual panels that tell the same story through images instead of text.
With AI, you don't need to draw those panels yourself. You write a description, the AI generates an image, and you end up with a working storyboard that's good enough to plan from — and often good enough to share with collaborators.
Step 1: Break Your Script into Scenes
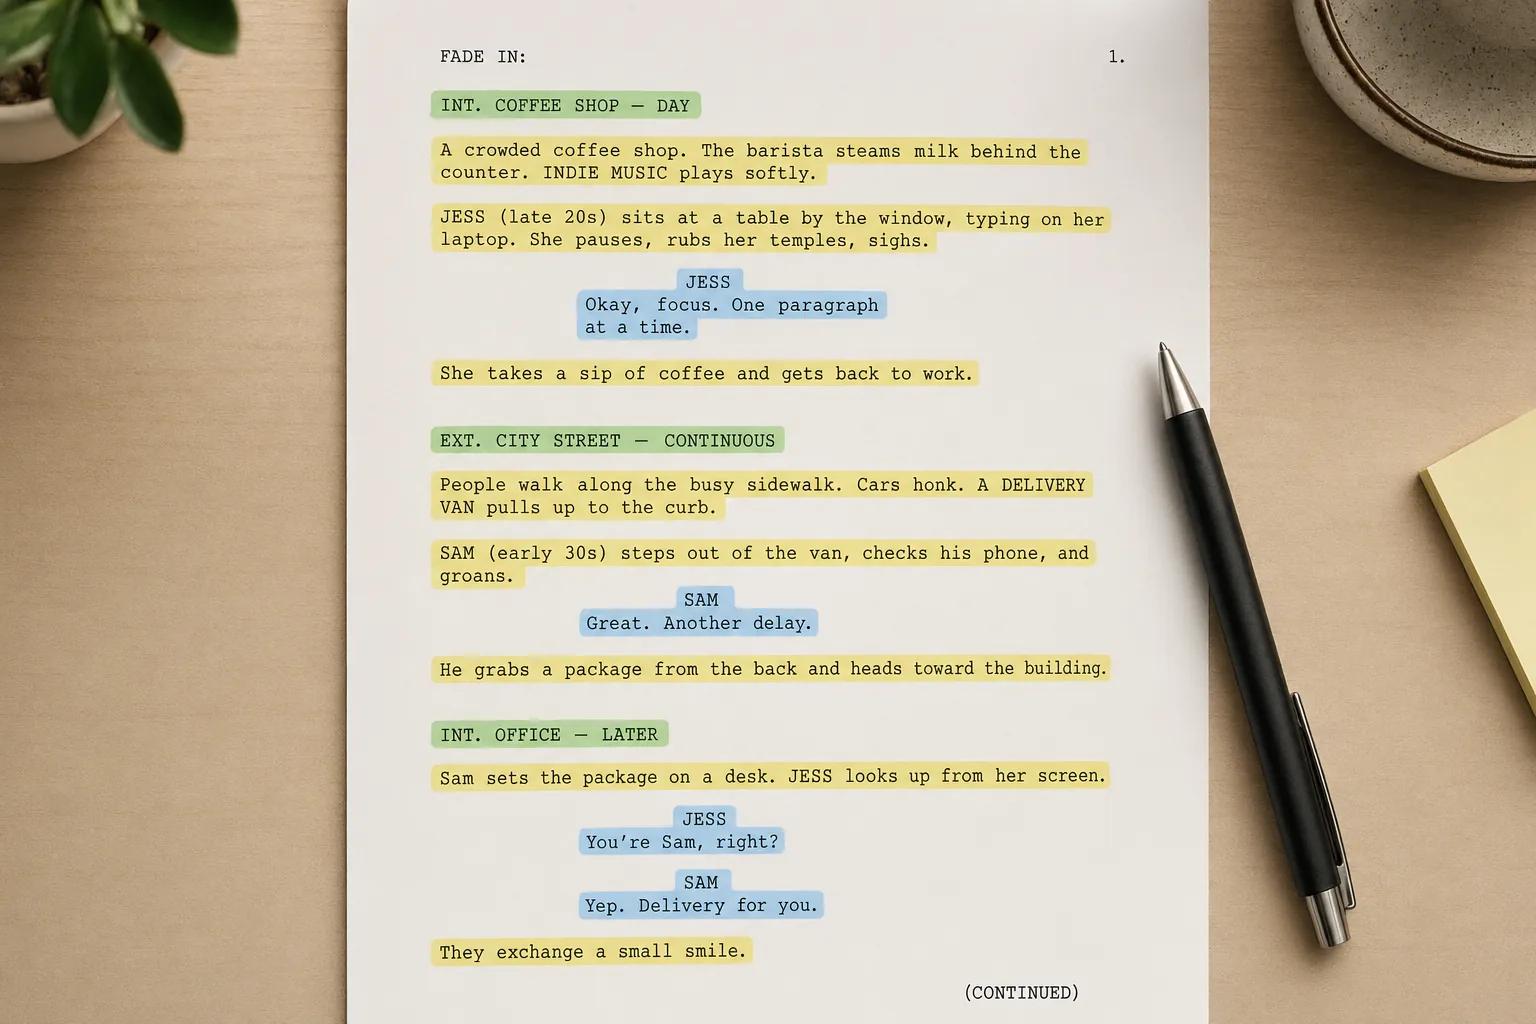
Before you can storyboard, you need to know what you're storyboarding. Start by reading through your script and marking every scene break — anywhere the location, time of day, or major action shifts.
For each scene, note:
- INT/EXT — interior or exterior
- Location — where it happens
- Characters present — who's in the scene
- Core action — what happens (not every line, just the key beat)
- Mood or tone — tense, warm, eerie, fast-paced
You don't need special software for this step. A simple text document or spreadsheet works fine. If your script is in industry-standard format (Final Draft, Fountain, Celtx), most of these fields are already structured — you're just pulling them out.
For a short film with 20 scenes, this breakdown usually takes under an hour. For a feature, block out a half day. The time you spend here makes every step after it faster.
Step 2: Identify the Key Visual Moments in Each Scene
Not every line of dialogue needs a storyboard panel. Storyboards capture the key visual beats — the moments where the image itself carries meaning.
For each scene you broke down in Step 1, ask:
- What's the first image the audience sees? (Establishing shot)
- What's the emotional peak of the scene? (The reaction, the decision, the reveal)
- Are there any camera moves or transitions that need to be planned? (A slow push in, a match cut to the next scene)
- Is there action that requires precise staging? (A chase, a conversation across a table, a character finding something)
As a rule of thumb: short scenes (under a page) need 2–3 panels. Dialogue-heavy scenes need panels at the start and end, plus any moment where a character's reaction changes the scene's direction. Action sequences can need 6–10 panels per page.
Write out your panel list in plain text first. Something like:
Scene 4 — INT. KITCHEN — NIGHT
Panel 1: Wide shot — Maya enters the dark kitchen, reaches for the light switch
Panel 2: Close-up — Her hand freezes mid-reach as she hears a sound
Panel 3: Over-the-shoulder — She turns toward the window
That's enough detail to move to the next step.
Step 3: Write Visual Prompts for Each Frame
This is where the AI side of the workflow starts. For each panel in your list, you'll write a visual prompt — a short description the AI uses to generate an image.
A strong prompt for storyboard generation includes:
- Subject and action: Who is in the frame? What are they doing?
- Camera angle and framing: Wide, medium, close-up, over-the-shoulder, low-angle, bird's eye
- Setting: Where is this? Indoors/outdoors, time of day, key environmental details
- Mood and lighting: Warm, cold, harsh shadows, soft backlight, overcast
- Visual style: Cinematic, graphic novel, pencil sketch, photorealistic
Keep prompts between 30 and 60 words. Be specific, but don't overthink it — you're describing a still image, not writing a scene.
Good prompt:
Medium shot, a young woman in a dark kitchen reaching for a light switch, hand frozen mid-reach, low-key lighting with blue moonlight through a window behind her, tension and dread, cinematic photorealism, shallow focus on her hand.
Weak prompt:
A woman in a kitchen at night looking scared.
The difference isn't length — it's specificity. Give the AI direction, framing, and atmosphere, and it will give you a usable frame.

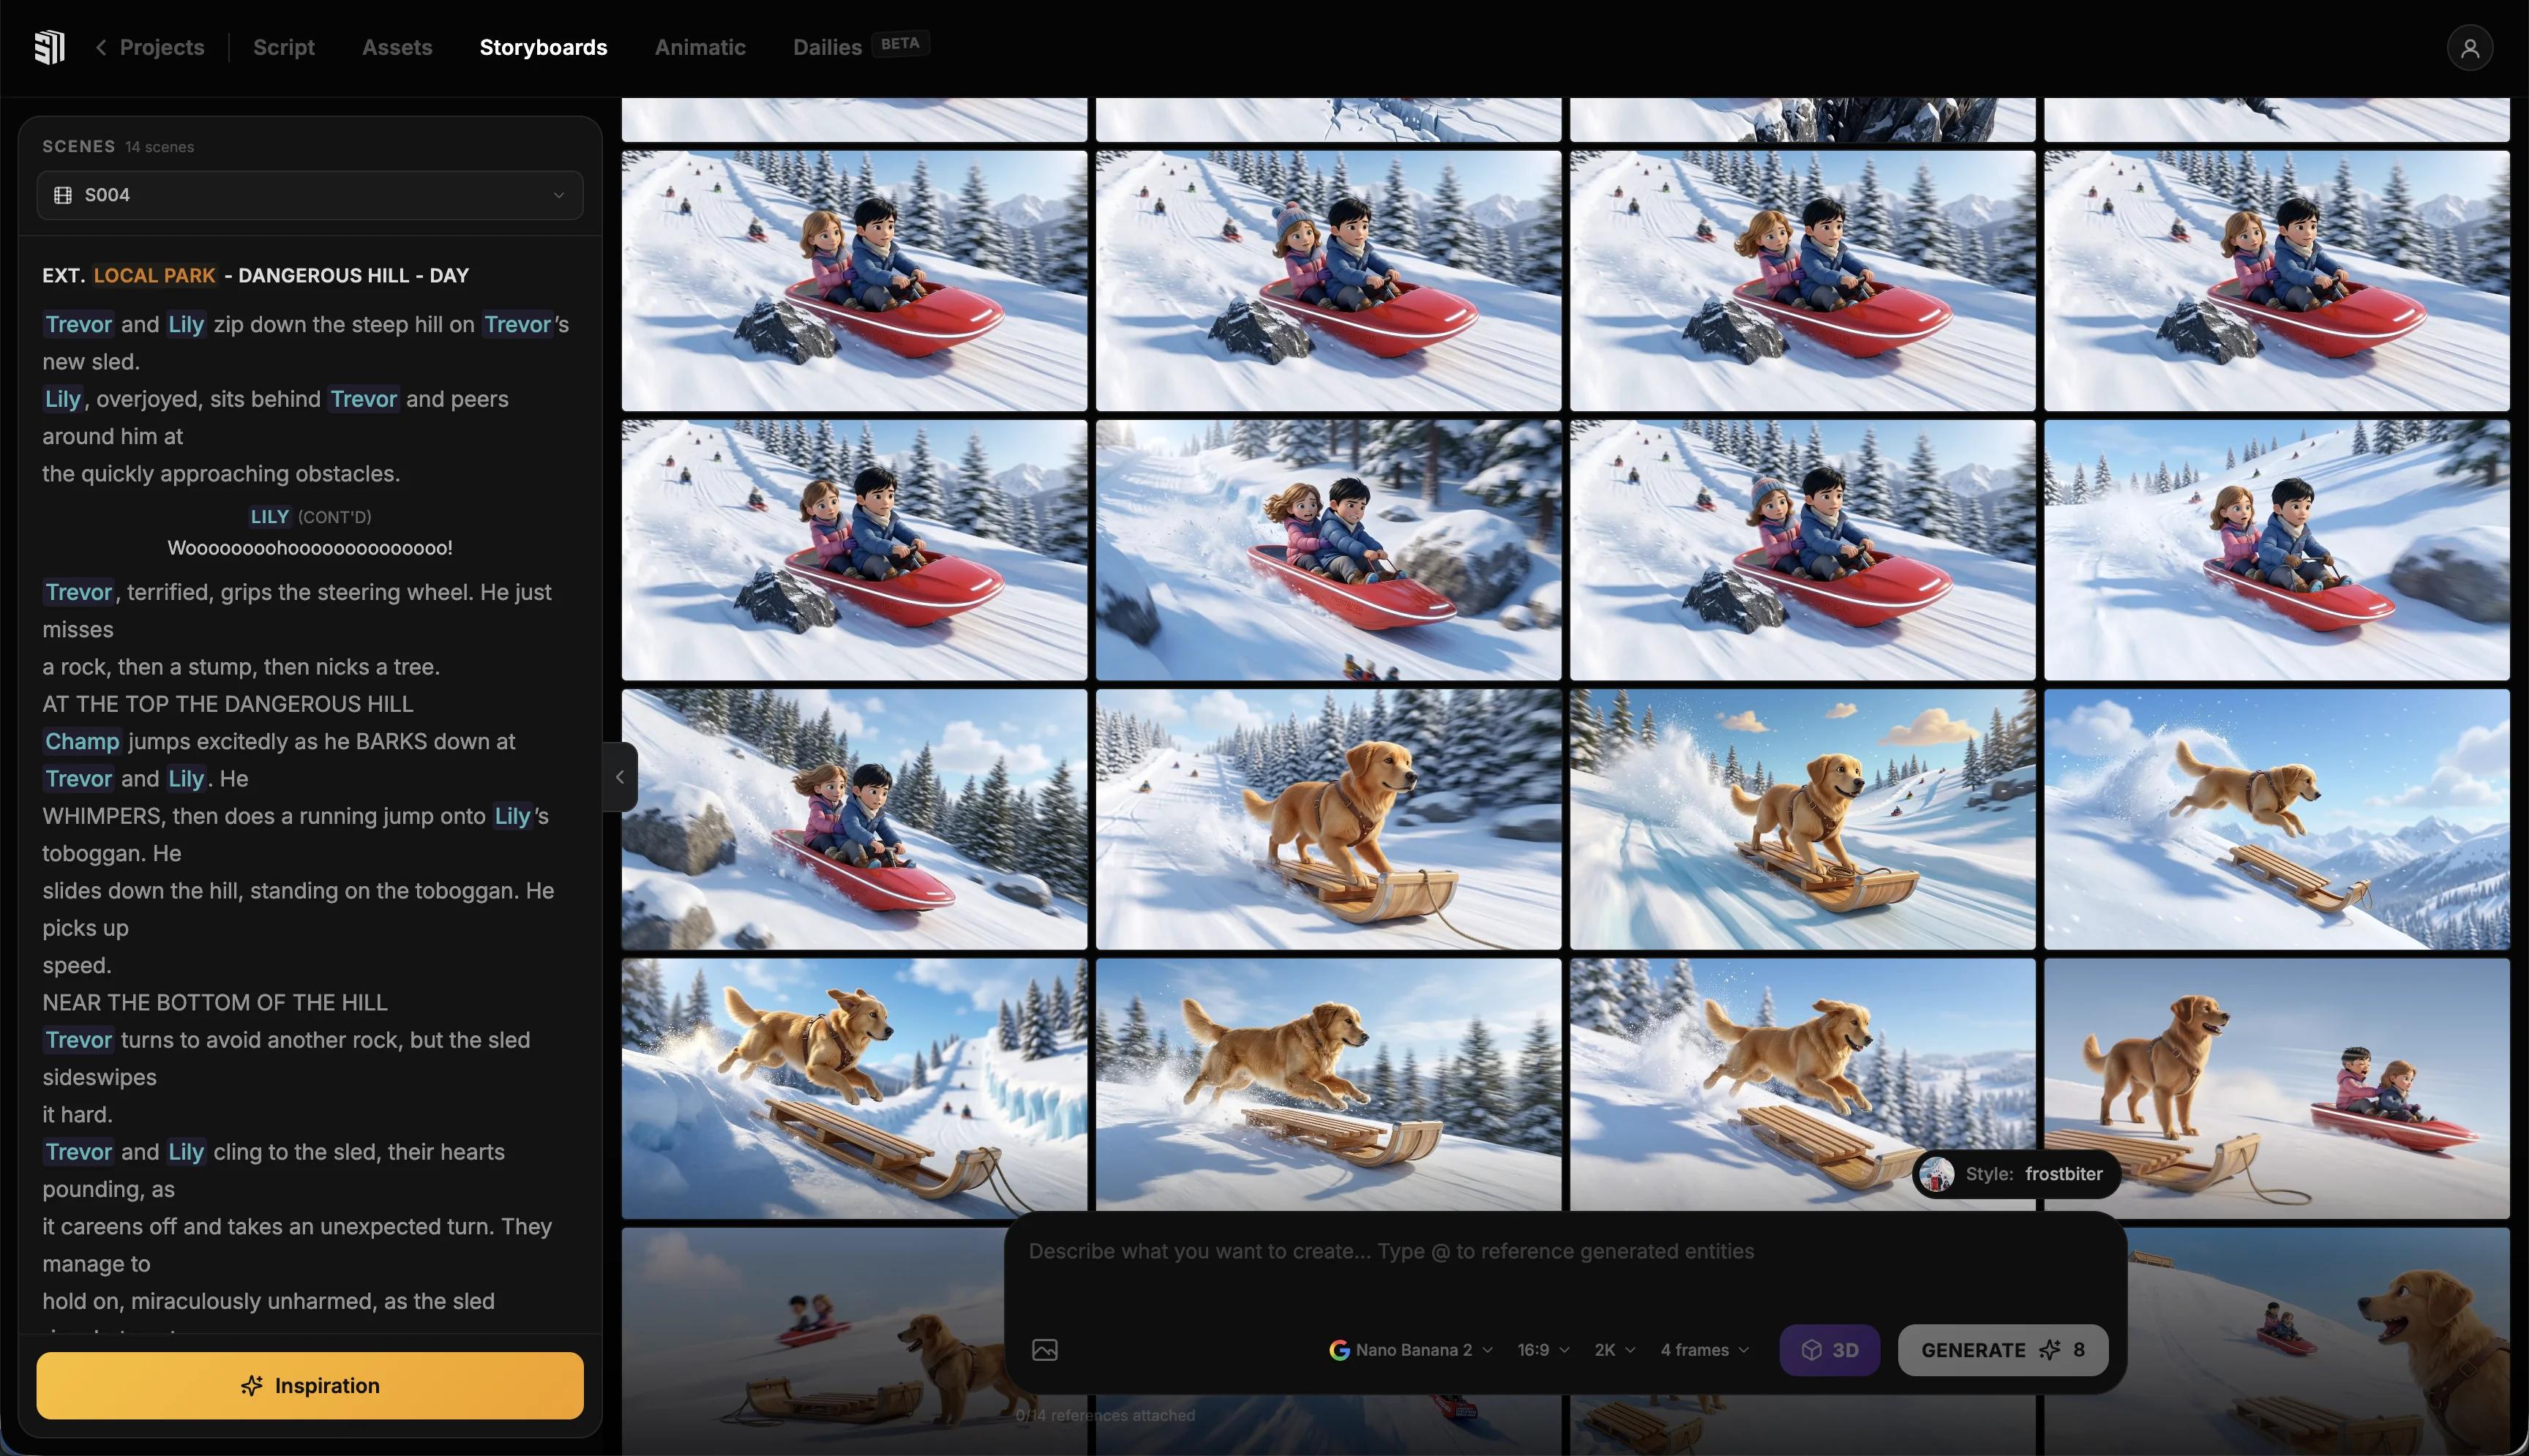
Step 4: Generate Your Storyboard Frames with AI
With your prompts written, you're ready to generate the actual visual panels.
If you're working in Storytella.ai, you can feed each scene prompt directly into the platform and generate a cinematic frame that matches your visual direction — complete with consistent characters, style, and lighting across all scenes. This is especially valuable if you're also planning to use Storytella to generate the final video: your storyboard frames and your production frames come from the same environment, which means what you see in pre-production is genuinely close to what you'll produce.
For pure storyboard generation (without moving to production), you can also use standalone AI image generators like Midjourney, DALL·E, or Stable Diffusion and paste in the prompts you wrote in Step 3.
Practical tips for this step:
- Generate 2–3 variations per panel, then pick the strongest one. Don't settle for the first result.
- Keep a consistent style prompt across all panels (e.g., "cinematic photorealism, 35mm film grain, shallow depth of field"). This makes your storyboard feel coherent instead of random.
- Save every generated image with a clear filename:
scene04_panel01_kitchen-wide.png. You'll thank yourself during the arrange step. - If a character needs to appear in multiple panels, describe them the same way every time — or use a platform like Storytella that maintains character consistency automatically.
Most scenes take 10–20 minutes to generate once you have solid prompts. A 20-scene short film can be fully storyboarded visually in a single afternoon.
Step 5: Arrange, Review, and Annotate Your Storyboard
Generating images is the fast part. Making them useful is the work.
Once you have your panels, arrange them in sequence — either in a presentation tool (Google Slides, Keynote, PowerPoint), a dedicated storyboard app, or simply in a grid in Figma or Canva. The goal is to be able to scroll through the whole film in order and see it as a visual story.
As you review, annotate each panel with:
- Shot type (WS, MS, CU, ECU, OTS, etc.)
- Camera move, if any (push in, pan right, handheld, static)
- Action note — what physically happens in this shot
- Dialogue line, if the panel corresponds to specific words
Then review for story problems. A storyboard makes it easy to spot issues that aren't obvious in a script: a sequence where every shot is the same framing, a scene transition that doesn't land, a moment that needs one more panel to land emotionally.
This review pass is where the real value of storyboarding shows up. Catching those problems now costs nothing. Catching them on a shoot day, or in post-production, costs a lot.
Common Mistakes When Storyboarding with AI
Writing prompts that are too vague. "A scary scene in a hallway" gives the AI nothing to work with. Describe the exact frame: angle, subject, action, mood.
Skipping the consistency step. If you generate panels one at a time without a shared style prompt, your storyboard will look like images from six different films. Define your visual style upfront and repeat it in every prompt.
Treating the first output as final. AI image generation is fast enough that there's no excuse for settling. Generate a few options, pick the best, and iterate when something looks wrong.
Over-storyboarding dialogue scenes. A conversation between two people usually needs an establishing shot, a few shot/reverse coverage panels, and a reaction close-up — not a panel for every line. Save the detailed breakdown for sequences where staging actually matters.
Forgetting what the storyboard is for. A storyboard is a planning tool, not a finished product. It should be useful enough to guide your shoot or your production workflow — it doesn't need to be polished enough to frame and hang on a wall.
FAQ
Can I use AI to storyboard if I've never made a film before?
Yes — that's one of the strongest use cases. If you're learning filmmaking, building a storyboard forces you to think about framing, pacing, and coverage before you touch any equipment. AI removes the barrier of not being able to draw, so you can focus entirely on the storytelling decisions.
What's the difference between a storyboard and a shot list?
A storyboard is visual — it shows what the camera sees, frame by frame. A shot list is a text document listing every shot you need to capture. They serve similar purposes but communicate differently. Most productions use both: the storyboard to communicate vision, the shot list to plan logistics. You can generate both from the same scene breakdown.
Do I need to write a full script before storyboarding?
Not necessarily. Many creators work from a scene outline, a treatment, or even a sequence of bullet-point beats. What you need is enough structure to know what happens in each scene and what the key visual moments are. The more defined your story, the more useful your storyboard will be.
How does AI maintain character consistency across storyboard panels?
Standalone image generators like Midjourney can be inconsistent — the same character may look different from panel to panel. To maintain consistency, either include the same detailed physical description in every prompt, use a platform with built-in character memory, or accept that your storyboard serves as a directional reference rather than a character bible. Storytella.ai maintains character consistency automatically across scenes, which makes it especially useful when you want your storyboard and your production frames to match.
How long does it take to storyboard a short film with AI?
A 10-minute short film with roughly 30–40 scenes typically takes 4–8 hours to storyboard from scratch using an AI workflow: 1–2 hours for script breakdown and panel planning, 1–2 hours for prompt writing, 2–3 hours for generation and selection, and an hour for arrangement and annotation. That's compared to days or weeks using traditional hand-drawn methods.
Can I use my storyboard directly in Storytella to generate video?
Yes. If you're using Storytella.ai, your pre-production prompts and your production prompts live in the same environment. The scene descriptions and visual direction you developed for your storyboard feed directly into scene generation — so your storyboard isn't a separate deliverable, it's the first step of your production workflow.
What file format should I save storyboard panels in?
PNG at a minimum resolution of 1024×1024 is a safe default for AI-generated panels. If you're sharing with collaborators or printing, export to PDF. For web sharing, compress to JPEG at 80–90% quality. Keep your originals at full resolution — you may want to crop or rearrange panels later.
Conclusion
The old version of this process — find a storyboard artist, wait for sketches, revise, repeat — made storyboarding a luxury that most indie filmmakers couldn't afford. AI removes that bottleneck. You can now go from script to visual storyboard in a single day, with no drawing skills and no freelance budget required.
The steps are simple: break your script into scenes, identify the key visual beats, write specific prompts, generate your frames, and arrange them into a sequence you can actually use. The tools have caught up to the ambition.
If you're building a storyboard because you're also planning to produce the film with AI, there's no reason to use separate tools for pre-production and production.
Try Storytella.ai and take your project from script to storyboard to final cut — all in one place, no crew required.
Your story awaits
The set is ready for you.
Turn your screenplay into stunning storyboards and animatics in minutes — not months. No drawing skills required.
Free to start · No credit card required · Cancel anytime