
Reference-Led AI Filmmaking: Working from a Photo or Painting
For filmmakers who already see the picture in their head — a workflow for turning one image into a whole film without losing the feel that made it click.
Some films start as a script. Others start as a single image — a photo you took on a trip, a painting you've stared at for years, a still from a movie you can't stop thinking about. You already know how the film should feel. You just don't have the crew, the location, or the lighting team to capture it.
This guide is for that creator. We'll walk through reference image AI video as a working method — how to read what's actually in your reference, translate it into prompts a tool can use, and keep that exact mood holding across every shot. By the end, you'll know how to take one picture and turn it into a finished film with Storytella.ai without losing the look that made the image click in the first place.
What Reference-Led AI Filmmaking Actually Means
Reference-led AI filmmaking is the practice of building a film around one or more visual anchors — a photograph, a painting, a film still, a concept render — instead of starting from a blank prompt. The reference becomes your style guide, your color script, and your mood board, all rolled into one image.
It's not the same as image-to-video, where a single still gets animated into a few seconds of motion. Reference-led work is broader. The image informs an entire production: dozens of shots, multiple characters, several scenes — all sharing the visual DNA of one source image.
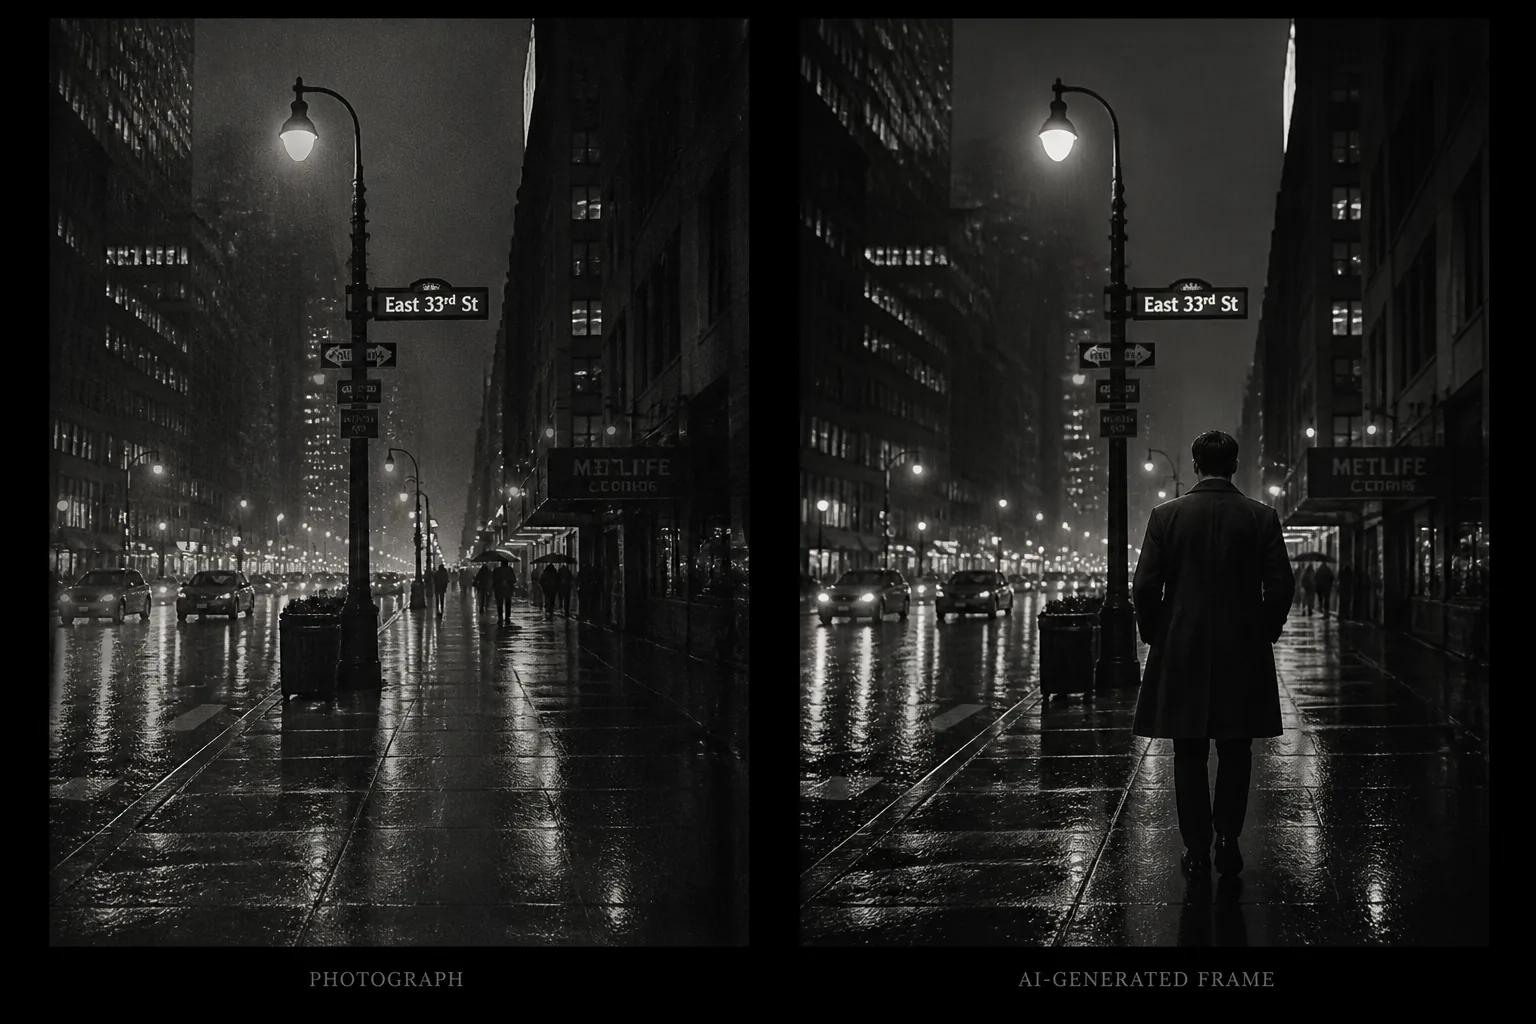
When the workflow goes right, a viewer can't tell which shot was the original reference. The whole film just looks like it belongs to the same world.
Why Start From a Photo or Painting?
Starting from a reference solves the hardest problem in AI filmmaking: consistency. AI tools are excellent at generating beautiful single shots, but they drift. Generate the same scene twice and you'll get two different lighting setups, two different moods, sometimes two different looking characters. Without an anchor, every shot becomes its own argument.
A reference image fixes the argument. It pins down questions you'd otherwise re-answer for every scene:
- What's the color palette?
- How hard is the light?
- What's the camera height and lens feel?
- What era or genre does this live in?
- How saturated, how grainy, how clean?
Once those answers are locked, every new shot is a variation on a known theme — not a coin flip.
Choosing the Right Reference Image
Not every image makes a good reference. The strongest references share a few traits — they're specific, they're consistent, and they leave room for the story.
Strong references:
- A photograph with clear lighting direction. Side light, backlight, golden hour — anything where you can name what the light is doing.
- A painting with a defined palette. Hopper, Caravaggio, Hockney — works where the color choices are deliberate and limited.
- A film still you can describe in one sentence. "Cold blue night, single neon sign, low angle." If you can describe it, an AI tool can match it.
Weak references:
- Busy compositions with conflicting light sources
- Heavily filtered Instagram photos where the look is the filter, not the lighting
- Generic stock photography with no point of view
- Images so abstract there's nothing concrete to extract
When in doubt, pick the image that makes you feel something specific. If you can't name the feeling, the AI can't either.
How to Read a Reference: Extracting What Matters
Before you write a single prompt, you need to translate the image into language. This step is where most reference-led films fail or succeed. The goal isn't to describe what the image looks like — it's to describe what makes it look that way.
Walk through the reference and answer these questions out loud or in a short note:
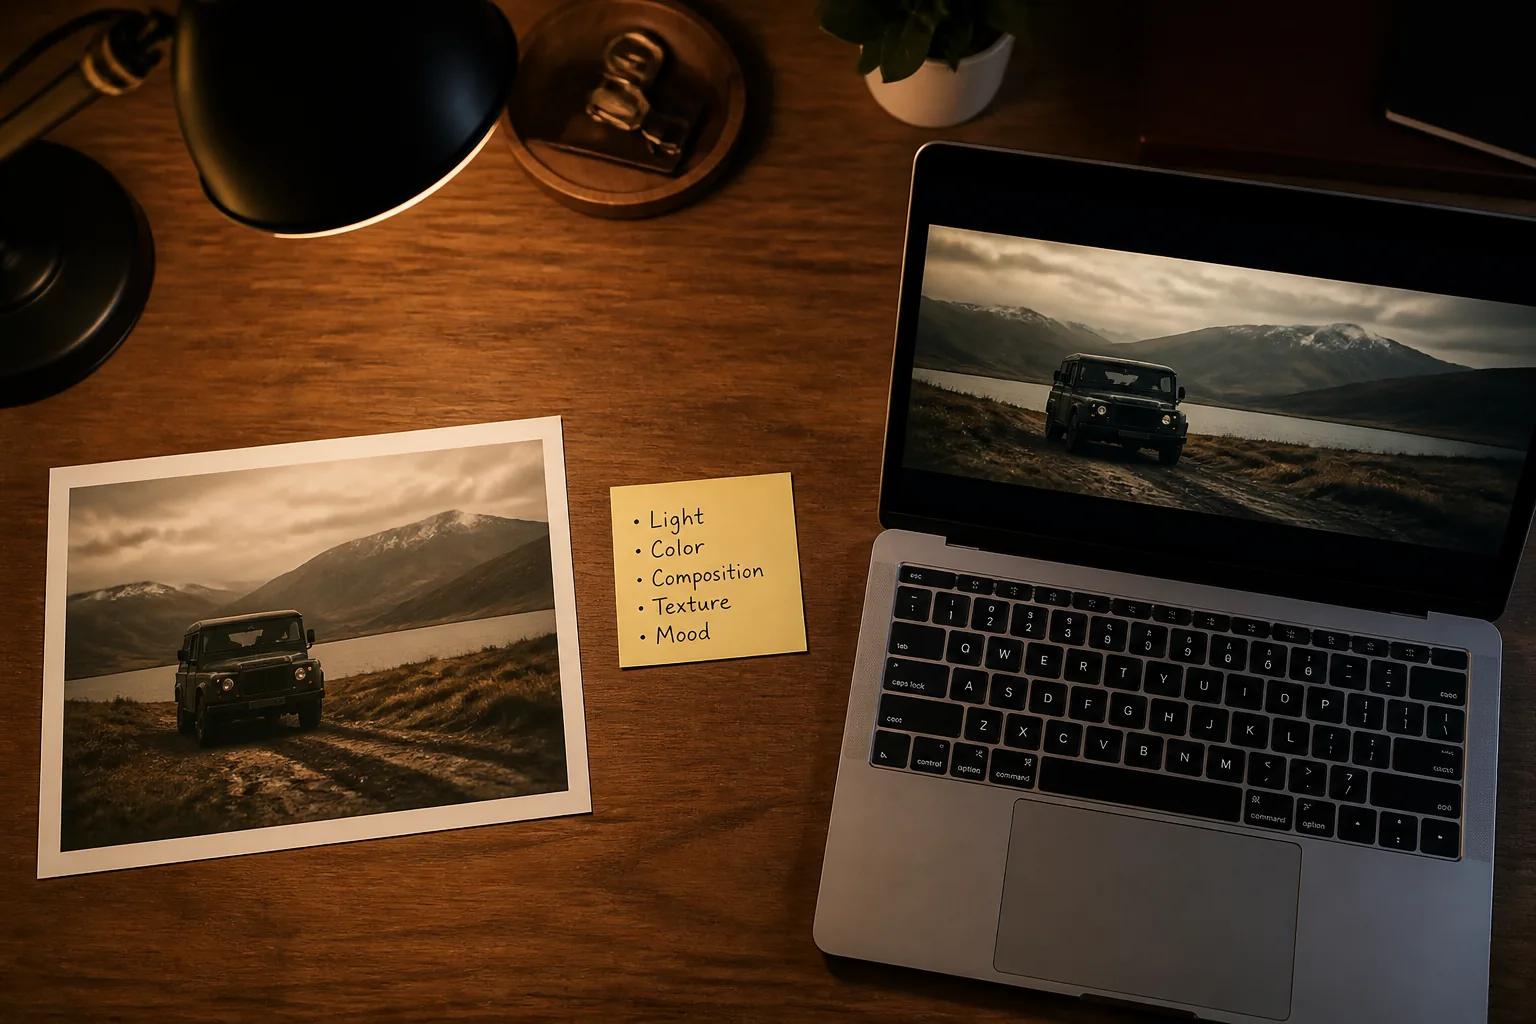
| Element | What to capture |
|---|---|
| Light | Direction, hardness, color temperature, time of day |
| Color | Dominant palette, saturation level, contrast |
| Composition | Camera angle, framing, depth, where the subject sits in the frame |
| Texture | Grain, sharpness, film stock feel, digital cleanness |
| Mood | One adjective: melancholy, electric, still, claustrophobic |
| Era | Time period or genre signal — '70s thriller, modern indie, classical painting |
You should be able to fit this in five short bullet points. That's your style brief. Every prompt you write from this point on should reinforce those five points.
The Reference-to-Film Workflow, Step by Step
Here's the workflow that takes one image and turns it into a finished film.
Step 1: Build the Style Brief
Use the table above to write your five-bullet style brief. Keep it on a sticky note next to your monitor. Every shot you generate gets checked against it.
Step 2: Generate One Test Frame
Don't generate ten shots before you know the look is right. Generate one. Use your style brief as the foundation of the prompt and place a single subject in the frame. Compare the result to the reference. If the lighting is off, fix the lighting words in your prompt. If the palette is off, fix the color words. Repeat until the test frame and the reference feel like siblings.
This is the most important step. Skip it and you'll waste hours regenerating later.
Step 3: Lock Characters and Scenes
Once your test frame matches, build out your characters and scene list with the same style brief baked in. Tools that handle character consistency across shots — like Storytella.ai — let you fix the look once and apply it across an entire production. That's the difference between a reference-led workflow and a one-shot experiment.
Step 4: Generate the Film in Passes
Don't try to generate the whole film in order. Generate one full pass first — one rough version of every scene — at lower quality. Watch the assembly. If anything drifts from the reference, you'll catch it before you've spent time on final renders. Then do a second pass on the shots that need polish.
Step 5: Refine, Don't Restart
When a shot feels off, resist the urge to throw it out. Most of the time, you can pull it back into the reference's orbit by adjusting one or two words in the prompt — softening the light, cooling the palette, lowering the contrast. Restart only when the shot is fundamentally wrong, not when it's mostly right.
Common Mistakes That Flatten the Look
Even with a strong reference, a few habits will quietly drain the mood out of your film.
- Describing too much. Long prompts that try to capture every element of the reference often produce muddier results than short, decisive prompts that capture the essential three or four elements.
- Ignoring the reference mid-project. Once you're ten scenes in, it's tempting to write prompts from memory. Keep the reference image visible in your workspace at all times.
- Mixing references mid-film. A film built from one reference has a unified feel. A film built from five references usually feels confused. If you need multiple references, designate one as the master and the others as scene-specific accents.
- Forgetting motion. A reference photograph is still. Films move. Plan how the camera and subjects will move within the frame, or your shots will feel like animated postcards.
FAQ
What's the difference between reference image AI video and image-to-video?
Image-to-video animates a single still into a short clip. Reference-led AI video uses one or more images as the style anchor for an entire film — multiple scenes, characters, and shots, all sharing the look of the reference. Reference-led work scales; image-to-video is closer to a single shot.
Can I use a copyrighted photo or painting as a reference?
You can use a copyrighted image as a private reference for style and mood, but you should not directly reproduce or imitate it in published work without permission. The safest approach is to use the image to extract a style brief in your own words, then generate from that brief. Public domain art and your own photography are always safer starting points.
How many reference images should I use for one film?
One is usually enough — and often best. If your film genuinely needs different looks for different scenes (a flashback, a dream sequence, a different location), use one master reference for the overall film and one accent reference per distinct sequence. Avoid going beyond three.
Will the AI copy the reference too literally?
Modern AI video tools don't replicate references pixel for pixel. They extract style cues — light, palette, mood — and apply them to your prompts. The risk is the opposite: the look gets diluted as you generate more shots. Keep your style brief tight and check every shot against the reference.
What if my reference doesn't translate well into a film?
Some images are great photographs but bad film references — usually because they rely on a single decisive moment that can't sustain motion. If your reference falls apart the moment you imagine a camera moving through it, swap it for one with more spatial depth. With Storytella.ai you can test this fast: upload, generate one short scene, and see if the world holds.
Do I need filmmaking experience to make this work?
No. Reference-led work is actually a good entry point for beginners because the image does most of the directorial thinking for you. If the reference has good light, your film will inherit good light. If the palette is restrained, yours will be too. The reference is the experienced filmmaker; you're the producer translating the brief.
How long does a reference-led film take to make?
A short film of one to three minutes can come together in a day or two with a tool that handles consistency well. The time-consuming part is the first test frame — once the look is locked, the rest of the film is fast.
Conclusion
The hardest part of AI filmmaking isn't generating beautiful shots — it's making twenty beautiful shots that feel like they belong to the same film. A single strong reference image solves that problem before it starts. It gives you a fixed point to measure every shot against, and a built-in answer to every directorial question that would otherwise stop the work.
Start from one image you genuinely love. Read it carefully, write a tight style brief, and let that brief guide every prompt you write. Generate one test frame before you commit. Refine instead of restarting. The film will end up looking like the picture in your head — because the picture in your head is right there in the reference, doing the heavy lifting.
Try Storytella.ai and turn one photo or painting into a finished film, with the same look holding from the first shot to the last.
Your story awaits
The set is ready for you.
Turn your screenplay into stunning storyboards and animatics in minutes — not months. No drawing skills required.
Free to start · No credit card required · Cancel anytime